Task 1 – Build a VIP with an Access Policy allowing access to VMware and Citrix
From “corporate-pc”
Open F5 config GUI
Disable Strict Updates for the lab2-proxy Application
- Go to iApps -> Application Services
- Click lab2-proxy
- Click Properties tab
- In Application Service pulldown, select Advanced
- Uncheck Strict Updates checkbox
- Click Update button
To save lab time, we removed “Strict Updates” so we can copy lab2-proxy Access profile objects
- Go to Access -> Profiles/Policies -> Access Profiles…
- Click “Copy” hyperlink on the lab2-proxy line
- In the “Copied Profile Name” field, type in
lab5-webtop - Click “Copy” button
View the characteristics of the lab5-webtop and lab3-lb-sf Access policies. To consolidate Citrix and VMware access, the subsequent steps will incorporate the components from Citrix policy into the copy of the VMware policy.
- Go to Access -> Profiles/Policies -> Access Profiles…
- On the lab2-proxy line, click Edit link. Review components and click Close
- on the lab3-lb-sf line, click Edit link. Review components and click Close
Open lab5-webtop VPE
- Go to Access -> Profiles/Policies -> Access Profiles…
- On the lab5-webtop line, click Edit link and review.
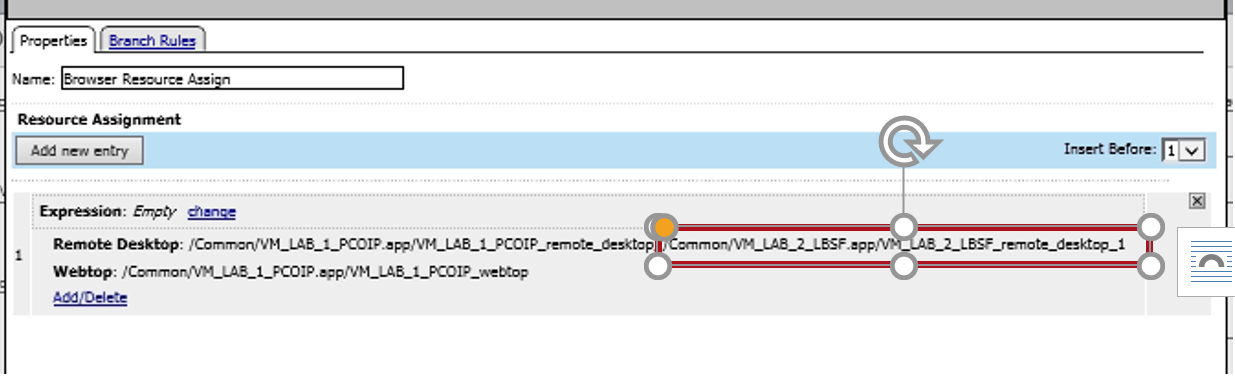
Add Citrix to the Browser Resource Assign on the Full or Mobile Browser branch
- Click Browser Resource Assign object on the right end or the branch
- In the Browser Resource Assign pop-up, click Add/Delete
- Click Remote Desktop… tab
- Select /Common/lab3-lb-sf.app/lab3-lb-sf_remote_desktop_1 checkbox. (Both check boxes should be selected)
- Click Update button
- Click Save button
Add a branch for the Citrix Receiver to Client Type
- Click Client Type object
- Click Branch Rules tab
- Click Add Branch Rule button
- In Name field, replace Branch Rule 1 with
Citrix Receiver - Under Citrix Receiver, click change link
- Click Add Expression button
- In Agent Sel pulldown, select UI Mode
- In UI Mode is pulldown, select Citrix Reciever
- Click Add Expression button
- Click Finished button
- Click Save button (this takes a while)
Add a Logon Page object to the Citrix Receiver branch
- On the Client Type, Citrix Receiver branch, click the “+”
- In the Logon tab, select Logon Page
- Click Add Item button
- Review the default settings
- Click Save button
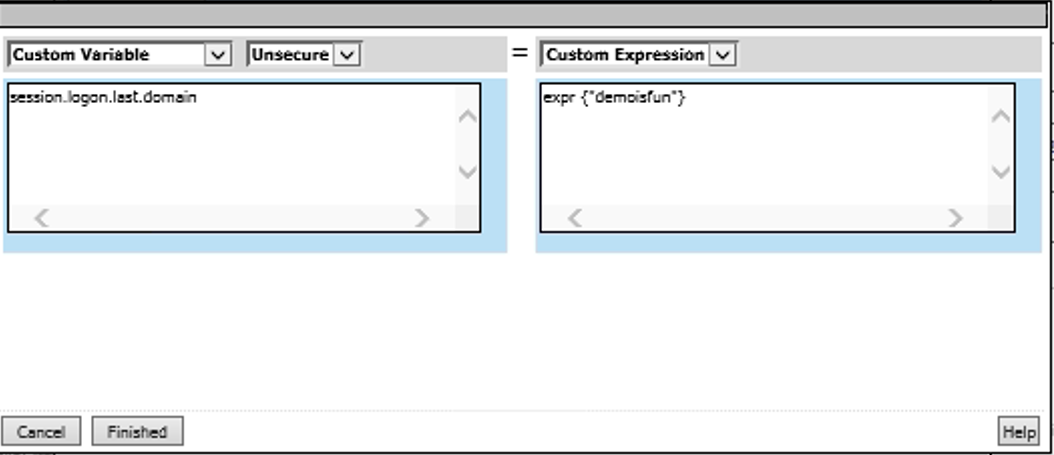
Add Domain Variable Assign object to the Citrix Receiver branch
- On the Logon Page, fallback branch, click the “+”
- Click Assignment tab
- Select Variable Assign radio button
- Click Add Item button
- Click Add new entry button
- Click change link
- On the left panel, below Custom Variable – Unsecure, type in
session.logon.last.domain - On the right panel, below Custom Expression, type in
expr {"demoisfun"} - Click Finished button
- Click Save button
Add an AD Auth object to the Citrix Receiver branch
- On the Variable Assign, fallback branch, click “+”
- Click Authentication tab
- Select AD Auth radio button
- Click Add Item button
- In the Server pulldown, select /Common/AD1
- Click the Save button
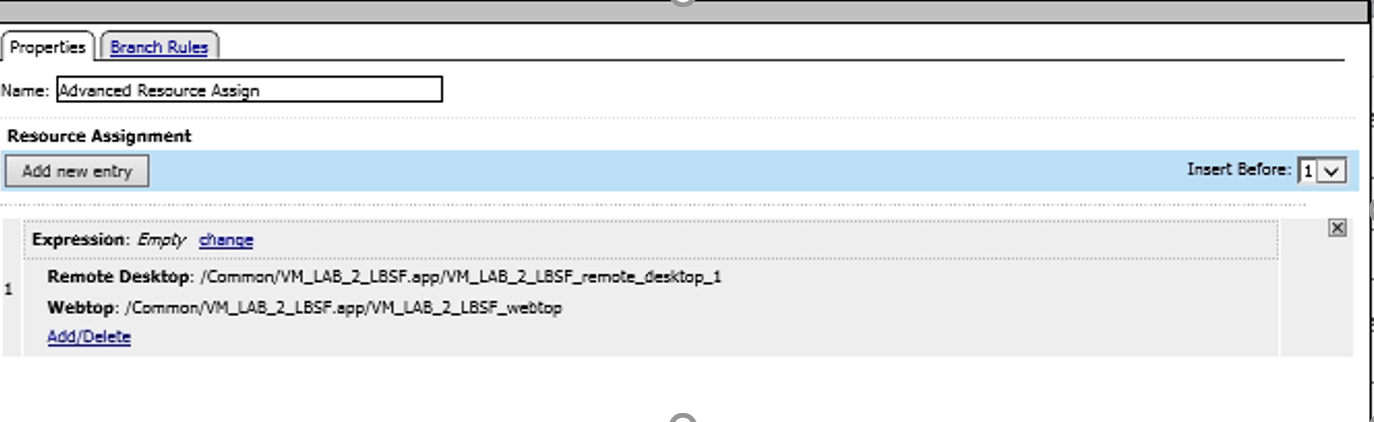
Add an Advanced Resource Assign object to the Citrix Receiver branch
- To the right of AD Auth, Successfull branch, click the “+”
- Click Assignment tab
- Select Advanced Resource Assign radio button
- Click Add Item button
- Click Add new entry button
- Click Add/Delete link
- Click Remote Desktop… tab
- Select /Common/lab3-lb-sf.app/lab3-lb-sf_remote_desktop_1 check box
- Click Webtop… tab
- Select Common/lab3-lb-sf.app/lap3-lb-sf_webtop radio button
- Click Update button
- Click Save button
- To the right of Advanced Resource Assign, fallback branch, click Deny
- Select Allow radio button
- Click Save button
- On the upper right corner, click Close the VPE. Click YES on the IE pop-up
Apply the access policy
- On the upper left corner of the main F5 GUI, click Apply Access Policy
- Select all policies, click Apply
- Verify that all Access policies status is Green (refresh browser if necessary)

Create a Virtual Server for PCOIP traffic
- Go to Local Traffic -> Virtual Servers -> Virtual Server List
- View the configuration of the lab2-proxy_pcoip_udp Virtual Server (VS). We will replicate this configuration using the IP of the new VIP we created for VDI access (Hint—Open an additional browser window connected to F5-bigip1a.demoisfun.net. This will allow you to display different VIPs in the same device)
- Go to Local Traffic -> Virtual Servers -> Virtual Server List
- Click Create button in the upper right section of the GUI
- Configure the VIP with the variables below
General Properties Name lab5-pcoipDestination Address/Mask 192.168.3.157Service Port 4172Configuration Protocol UDP Source Address Translation Auto Map Access Policy Application Tunnels (Jave & Per-App VPN) Enabled - Checked - Click Finished button
Create a combined VS for Citrix and VMware connectivity
- Go to Local Traffic -> Virtual Servers -> Virtual Server List
- Click Create button in the upper right section of the GUI
- Configure the VIP with the variables below
VIP Config Parameters
General Properties Name lab5-vdiDestination Address/Mask 192.168.3.157Service Port 443Configuration HTTP Profile http SSL Profile (Client) lab2-proxy_client_ssl SSL Profile (Server) serverssl Source Address Translatio Auto Map Access Policy Access Profile lab5-webtop_webtop Connectivity Profile lab2-proxy_connect VDI Profile vdi Click Finished button
Test Connectivity
From “home-pc”
Open IE and browse to
https://vdi.demoisfun.net. Note this address has been configured in DNS to resolve to the VIP 192.168.3.157When prompted for credentials
- Username: demo01
- Password: password
APM webtop is displayed with - Agility - Vmware View Desktop - Agility - Agility VDI Class (Citrix)
Click Agility - Agility VDI Class to launch XenDesktop
In Select client* pop-up, click Citrix Receiver button
Verify that desktop is functional
In Citrix Agility desktop, click Start -> Disconnect. This will return you to APM webtop
Click Agility - Vmware View Desktop
In Select client pop-up, click VMware Horizon button
Verify that the VMware desktop functions
Close View client
